logo dark logo light logo
  • Home
  • Products
    • Wet & Forget Outdoor
      • Application
      • Before & Afters
      • Surfaces
      • Testimonials
      • FAQs
    • Wet & Forget Indoor
      • Application
      • Before & Afters
      • Surfaces
      • Testimonials
      • FAQs
    • Wet & Forget Shower
      • Application
      • Before & Afters
      • Surfaces
      • Testimonials
      • FAQs
    • Miss Muffet’s Revenge
      • Application
      • Testimonials
      • FAQs
  • Videos
    • Wet & Forget Outdoor Videos
    • Wet & Forget Indoor Videos
    • Wet & Forget Shower Videos
    • Miss Muffets Revenge Videos
    • New Home Spotlight
  • Contact
  • Sign Up
  • Store Locator
  • Visit Wet & Forget
Menu
mobile logo
  • Home
  • Products
    • Wet & Forget Outdoor
      • Application
      • Before & Afters
      • Surfaces
      • Testimonials
      • FAQs
    • Wet & Forget Indoor
      • Application
      • Before & Afters
      • Surfaces
      • Testimonials
      • FAQs
    • Wet & Forget Shower
      • Application
      • Before & Afters
      • Surfaces
      • Testimonials
      • FAQs
    • Miss Muffet’s Revenge
      • Application
      • Testimonials
      • FAQs
  • Videos
    • Wet & Forget Outdoor Videos
    • Wet & Forget Indoor Videos
    • Wet & Forget Shower Videos
    • Miss Muffets Revenge Videos
    • New Home Spotlight
  • Contact
  • Sign Up
  • Store Locator
  • Visit Wet & Forget
best tips on prepping walls for painting
October 7, 2016
Home Improvement, Miscellaneous

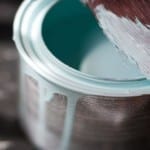
6 Tips on Prepping Walls for Painting

Painting walls can be troubling when there numerous wall flaws that will disrupt your painting. Luckily, there are a lot of quick fixes for wall issues; here’s what you need to know about prepping walls for painting.

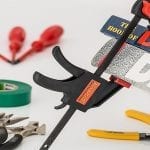
We’ve collected a list of six common problems with walls that people run into when they go to paint or repaint a room and the solutions to these problems.
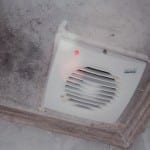
1. Stained Walls

stain-wall

When going to paint a stained wall, you should first try to wash off the stain. If this fails to work apply a stain-blocking primer with a paint roller. This will keep the stain from bleeding through the new paint.

2. Popped Nails in Walls

repair

For a popped nail put a 1-1/4-inch drywall screw into the wall either 2 inches below or above the popped nail.  After this, pry out the popped nail while holding a putty knife below the pry bar to guard the wall.

Next use your putty knife to tap the empty nail hole which will then knock the protruding drywall remains into the wall. Last, use three coats of joint compound to seal up the nail hole and cover up the screw head.

3. Glue Spots on Walls

glue-wall

Glue spots are easy to remove. Use a utility knife to score the paper and then peel off the old glue. You can also use sandpaper in smaller areas where you find leftover glue.

If you create any accidental gouges during the removal of the glue, they can be filled with compound and sanded smooth.

4. Torn Paper on Walls

wall2

First, cut away any loose paper from the torn area. Next, use a stain-block primer to seal the visible drywall. Once the primer has dried, sand the visible drywall edges to remove paper nubs.

After this, use a thin layer of joint compound to cover the gouge. Finally, apply a second coat if needed, and feather it out across the wall. Once the surface is dry, sand the surface smooth.

5. Mark and Repair Hidden Flaws on Walls

wall

To find minor flaws on your walls turn off all of the lighting fixtures in the room and close the curtains. Next, hold a trouble light next to the wall and run it across the surface.

Whenever you come across a blemish place a piece of tape next to the problem so you can quickly find it when you’re ready to repair with spackling or joint compound.

6. Holes in Walls

hole-in-wall-prepping-wall

To repair small holes in your wall use a spackling compound, for large holes use joint compounds. Simply apply a thin layer of the compounds with a putty knife.

Apply two additional coats after the first one dries. Sand the surface between coats. Use fine-grit paper to sand the surface after the final coat.

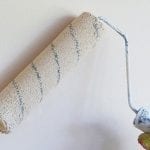
Once all of your minor flaws are fixed your walls will finally be ready for paint. Several even coats of paint will have your walls looking new again.

For more information on preparing walls for painting, click here.

(Photos Courtesy of Bernhard Shwarz, dotpolka, Chu 3D, Mario Valenta)

Check out these 6 common pre-painting problems to avoid hassle when you start painting.
tips for preparing walls for painting

Related Posts

  • Get the Job Done Right with these 4 Essential Painting TipsGet the Job Done Right with these 4 Essential Painting Tips
  • Home Improvement Projects to Leave to the ProfessionalsHome Improvement Projects to Leave to the Professionals
  • Increase Your Home’s Value with Crown MoldingIncrease Your Home’s Value with Crown Molding
  • How-tos for Painting Over Stains on Walls and SurfacesHow-tos for Painting Over Stains on Walls and Surfaces
  • Discover 4 Ways Wet & Forget Indoor Makes Eliminating Mold Super-Easy!Discover 4 Ways Wet & Forget Indoor Makes Eliminating Mold Super-Easy!
  • Fabulous DIY Faux Paint & Gel Stain Finishes for the Modern HomeFabulous DIY Faux Paint & Gel Stain Finishes for the Modern Home
Tags: DIY, holes, house, how to, nails, painting, quick fix, tips, walls
Share:
Posts you'd might like
Bright fall leaves on a deck
September 19, 2017
2 Quick Fall Crafts to Decorate Your Home
Pipe Shelves Completed adorned with Cameras
January 16, 2017
Contemporary and Industrial DIY Shelving Units
home improvement projects for professionals
October 5, 2016
Home Improvement Projects to Leave to the Professionals
Post a comment cancel reply

Search
Categories
  • Bathroom Cleaning
  • Gardening
  • Home Décor
  • Home Improvement
  • Indoor Cleaning
  • Miscellaneous
  • Outdoor Cleaning
  • Promotions
  • Spider Control
Recent Posts
  • Vegan Twists On Classic Thanksgiving Dishes
  • How to Check for Outdoor Damage After Winter Storms
  • How to Reduce Fall Allergies for Easy Breathing
  • Boost Fall Flavors with an Indoor Herb Garden
  • Preparing Your Garden and Yard for Fall
Tags
best shower cleaner best spider killer black algae clean shower fixtures deck cleaner deck cleaning DIY enter to win flower garden get rid of spiders grand prize great backyard giveaway green algae indoor garden indoor herb garden indoor mold kill spiders mildew cleaner mold mold & mildew mold and mildew mold and mildew cleaner mold and mildew remover mold and mildew stains moss moss on roof moss remover recipes remove deck stains remove mold and mildew remove shower grime roof cleaner roof moss save money shower cleaner shower spray soap scum spider killer spiders spray and rinse spray once spring cleaning vegetable garden water damage weekly shower spray