How-tos for Painting Over Stains on Walls and Surfaces
Did your kiddo recently “decorate” a bedroom wall with a permanent marker? Or maybe you’ve noticed a suspicious stain on the basement ceiling? Painting over stains on indoor surfaces is 3-step simple.
First, you’ll need to do a little detective work to determine your type of stain. Continue reading for tips and how-tos –
How to Paint Over A Marker Stain

If your kid’s creative muse has left a mark, here’s how to hide it –
What You’ll Need –
- Liquid dishwashing soap
- Kitchen sponge
- A small bucket filled with water
- A fine-grit sanding sponge
- Tack cloth
- Paintbrush or paint roller
- Stain-blocking primer
- Interior latex paint (to match the surface)
First, clean the stained area –
Squirt a little liquid dishwashing soap into a water-filled bucket and clean the stain with a kitchen sponge. Rinse the sponge in clean water. Wipe the area to remove soap residue. Let dry.
Sand – apply primer – sand again.
Use a fine-grit sanding sponge to sand the stain lightly. And sand around the perimeter of the marker stain – out 3 inches from the center. The goal is to roughen the surface lightly.
Do not sand through the paint. Remove remaining sanding dust with a tack cloth.
Apply a thin coat of stain-blocking latex primer over the sanded area. Let dry. Apply a second primer layer if the marker is showing through. Also, check the paint can to see if the manufacturer recommends a second layer.
Note: Markers contain a dye that may appear on the wall again after painting over them. Prevent bleed-through by prepping the surface well with a quality, stain-blocking primer.
Lightly sand the second primer layer with the sanding sponge.
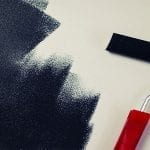
Paint On –
Paint a thin coat of interior latex paint over the primed surface. Let dry.
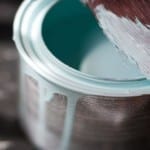
If possible, match the existing wall color with leftover paint. If not, buy a new can that matches the current color. Also, match the existing paint sheen – gloss, semi-gloss, satin or matte.
Pro tip: The glossier the paint finish, the more stain-resistant it will be.
Apply a second layer or more – until the new paint matches the surrounding wall.
Pro tip: The paint will appear darker when wet, making it difficult to see a color match. Wait for the paint to dry thoroughly before applying another layer.
For more information on painting over a marker stain, visit here.
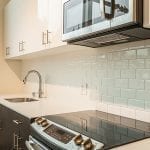
How to Paint Over a Stubborn Kitchen Grease Stain –
Preparing meals, especially frying foods on the stovetop, can make for greasy splatters and unsightly stains on a kitchen wall. Most of the time, grease can be wiped off the surface.
However, at times a stubborn grease stain remains on the wall. If you paint over the spot, the grease will eventually soak through the paint, and the stain will show up again.
Painting over stains like kitchen grease can be a challenge. Most kitchen stains are caused by hot cooking oils splattering onto the stove wall. The first step is to remove any grease entirely from the surface.
Spray Wet & Forget Indoor on the wall and wipe with a clean cloth or sponge. Once the grease is gone, you’re ready to sand and paint your wall!
What You’ll Need –
- Fine-grit sandpaper
- Damp, clean rag
- Paintbrush or Paint roller
- Stain-blocking latex primer
- Interior latex paint (to match the surface)
Sand and Prime –
Roughen the cleaned surface with fine-grit sandpaper – lightly sand the area. Remove sanding dust with a tack cloth or a clean, slightly damp rag.
Apply a thin coat of stain-blocking latex primer over the sanded area. Let dry. Apply a second primer layer if the stain is still visible. (Check the container to see if the manufacturer recommends a second coat.) Applying the stain-blocking primer will stop any remaining grease from showing through the new paint.
Repaint the surface –
Paint a thin coat of interior latex paint over the primed surface. Let dry.
Painting over stains – If possible, use matching leftover paint on the prepped surface. If not, buy a new can of paint that matches the existing color. Remember to match the current paint sheen as well.
Apply a second layer of paint or more – until the new paint matches the surrounding surface.
For more information on painting over grease stains, visit here.
Painting Over Mold and Mildew Stains –

The often-asked question is – I have mold on a basement wall. Can I paint over it? The answer is – initially, no. Why?
Although painting over mold is the quickest solution to hiding those ugly, black, and green spots, it won’t fix the underlying issue – mold growth. Plus, the paint will only temporarily mask the stains – they’ll soon be back.
Mold growth is a sign of too much moisture in or behind the wall or ceiling. You may have a water leak. And what you see may only be the beginning.
The moisture problem that is causing the mold or mildew needs to be fixed before removing any growth or painting the surface. Once this is fixed, the mold or mildew must be removed from the surface.
A simple application of Wet & Forget Indoor will kill the mold or mildew to the root. To apply Wet & Forget Indoor, use the following instructions:
- Spray Wet & Forget Indoor 6-8 inches away from the surface until it is thoroughly wet.
- Allow the surface to dry for at least 10 minutes.
- Wipe the surface with a clean cloth or sponge.
After this, a quick coating of mold-resistant paint will cover up the staining, and your surfaces will look new!
Painting over stains on indoor walls and surfaces can be accomplished in three easy steps – clean, prime, and paint. Follow the tips and how-tos above to enjoy a stain-free house today.
For more house and interior painting tips, visit here.
For more cleaning tips for your house, click here.