Weather Stripping How-Tos for Doors and Windows
Do your windows rattle on a windy day? Do you feel a slight draft when you stand next to an exterior door? If so, your indoor air, either heated or cooled, is leaking outside from the weather stripping.
This can become an expensive problem that will show up on next month’s utility bill. That’s why good weatherstripping for doors and windows is essential.
Worn or insufficient weatherstripping is often the cause of chilly indoor drafts in the winter and heat gain in summer. According to Energy.gov, sealing a drafty house can save you more than 20% of your heating and cooling bills.
Is there one type of weatherstripping that works better than others?
Weatherstripping is manufactured from various materials, including foam, felt, vinyl, sponge rubber, aluminum, and stainless steel. It is available in two types – adhesive-backed self-stick tape and nail-on strips.
Furthermore, the type you choose to install will depend on your particular window or door configuration.
Self-stick weatherstripping for doors and windows –
Self-stick weatherstripping is springy, pliable, and usually made of foam, felt, vinyl, or sponge rubber.
The convenient adhesive backing makes it easy to install. This self-stick version is often used where using nails isn’t possible. The self-stick type is best for sealing a window that is too irregular.
Nail-on weatherstripping for doors and windows –
Nail-on weatherstripping is rigid and usually made of aluminum, vinyl, bronze, or stainless steel. It is usually available in a V-shape or a coiled tube design. The nail-on version is more secure than the self-stick variety since it is nailed into place.
Self-stick vinyl in a V-shape or a flexible strip –

This material will create an air-tight seal. Especially when pressed against the sides of a crack.
Best Use – For double-hung or sliding glass windows. Or for the sides and top of a door.
Cost – Moderate. The price will vary depending on the material.
Pros – Self-stick vinyl is durable and easy to install. Moreover, it’s not noticeable when properly applied.
Cons – For self-stick vinyl to work well, the door or window surface should be smooth and perfectly flat. Self-stick vinyl may create resistance when opening or closing doors or windows.
Tubular rubber or vinyl –
Vinyl or sponge rubber tubes are available with a flange along the edge, which is used to staple or nail it. The door or window presses against it to form a tight seal.
Best Use – Around a door
Cost – Moderate to high
Pros – It makes an effective air barrier
Cons – Self-stick types can be challenging to install
Nonporous Foam Tape –
Best Use – Window sashes, door frames, attic hatches, or inoperable windows. It also works well in corners and around cracks.
Cost – Low
Pros – Easy to install. And, if you need reinforcement, use some tacks or staples.
Cons – It’s best to use nonporous foam tape in areas that experience minimum wear as product durability may vary. Visible to the eye.
Felt –
Available in regular felt or reinforced felt with a metal strip – sold in rolls. Felt can be stapled, nailed, or glued into place. The best-felt seal is achieved by stapling parallel to strip length. Durable, 100% wool felt is the best choice, but it is more expensive.
Best Use – Fitted into a door jamb. For reinforced felt, around a window or door.
Cost – Low
Pros – Inexpensive and easy to install
Cons – Minimal durability; does not circumvent the flow of air well. Do not use felt in a location that is continually exposed to moisture. Moreover, it is visible to the eye.
Removing Old Weather Stripping from Doors and Windows
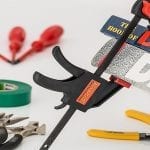
What You’ll Need
- Pry bar
- Screwdriver
- Clawhammer
To remove weather stripping from doors –
- Remove the door from the hinges to access the old weather stripping.
- Locate the weather stripping. Typically, it is where the door connects to the jamb. It may also be found at the top and bottom of the removed door.
- To remove it, place the pry bar underneath. Secure the pry bar with a hammer with a light tap or two.
- Pull the pry bar toward you to dislodge the old weather stripping. Move along the door jamb and across the top and bottom of the door to remove all old weather stripping. Lastly, use a screwdriver to remove it from the top or bottom of the door if it has been attached with screws.
To remove weather stripping from windows –
Remove all chipped or loose paint that is touching the weather stripping. For stick-on weather stripping, gently pull to remove it or use a putty knife.
Furthermore, if you have worn metal-edge weather stripping, use needle-nose pliers to remove tacks or nails.
Applying Weather Stripping to Windows and Doors

First, prep the surface – It’s always a good idea to start with a clean, dry surface. Remove all adhesive left on the surface with a cleaner or fine-grit sandpaper.
For holes, use wood filler and sandpaper. Also, fill old screw holes.
Step 1
Measure and add the numbers for the perimeter of the window or door. Also, add 5% to 10% to the result to ensure you have enough material for the job. (Keep in mind weatherstripping comes in several widths.)
Step 2
Read the instructions on the package to determine what tools you’ll need and the specific methods used to install the weatherstripping.
Below are a few general installation guidelines to follow-
- Apply weather stripping to the entire door jamb, adding it in one continuous strip along each side of the door.
- Weatherstripping should meet tightly at corners
- Choose a thickness that will cause the product to press tightly between the door and the jamb. But not so tight that it makes the door difficult to shut.
- For windows, apply it between the frame and sash. Choose a thickness that will seal tightly but not interfere with window operation.
- Install new weather stripping to a clean, dry surface. Outside temps should be above 20°F (-7° C).
- Double-check your math by measuring your door’s or window’s perimeter twice – and cut once.
- Weatherstripping should be snug against both surfaces. Plus, it will create an air tight seal on the door or window when compressed slightly.
Interested in more home improvement tips? Visit here. For additional window care how-tos, click here.
Rein in your heating and cooling bills by replacing old, worn weather stripping for doors and windows. Your wallet will thank you!


Related Posts
 Keep Your Pool Fun and Mildew-Free with Wet & Forget!
- 3 Inexpensive Home Improvement Tips You Can’t Afford to Miss
- 3 Fall Home Improvement Projects to Do Before Winter
- 4 Tips to Find the Top Contractor for Your Home Improvement Project
- Home Improvement Projects to Leave to the Professionals
- 6 Can’t-Miss Easy Home Improvement Tricks