Get Crafty With These 3 DIY Wall Decor Ideas
Finding home and wall decor pieces can be challenging at times. Plus, it may not be the color or look you were hoping for in your living space. Don’t fret! You can opt to do it yourself. Stay inside where it’s warm, and get crafty this winter season with these DIY wall decor ideas.
DIY Hanging Metal Hoop Wreath Wall Decor
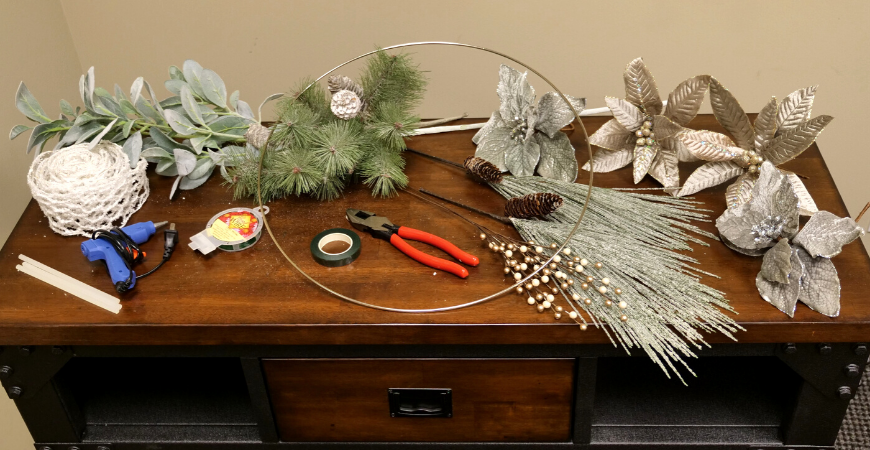
What You’ll Need
- Steel ring – 19 inches (1)
- Zip ties (2)
- Floral wire
- Hot glue gun
- Floral stem cutters
- Floral stem wrapping tape
- Poinsettia pick (2)
- Pine pick with pine cones (2)
- Berry pick (1)
- Eucalyptus pick (2)
- Iced pine branch pick (2)
- Pine cones (optional)
Instructions
1) Collect the supplies needed
Gather the supplies needed from the ‘What You’ll Need’ space above. If you have different flower ideas in mind, then feel free to create a design with your favorites!
Moreover, a unique design option is to use dried flowers from your summer or fall garden. Plus, the garden’s free floral picks add a personal touch to the room.
2) Draft up your craft
Lay the steel ring down and play with your floral design ideas for this wall project. Doing so will help you figure out where to place the floral picks permanently.
Moreover, drafting your craft will allow you to design the wreath to your liking. For example, if you want to get a fuller wreath, you can add more floral picks to it or vice versa for one more simple.
3) Trim the picks
If there are floral pick stems that poke out more than you’d like, then trim the picks. However, make sure to leave a bit of the stem so you can secure it properly onto the steel ring.
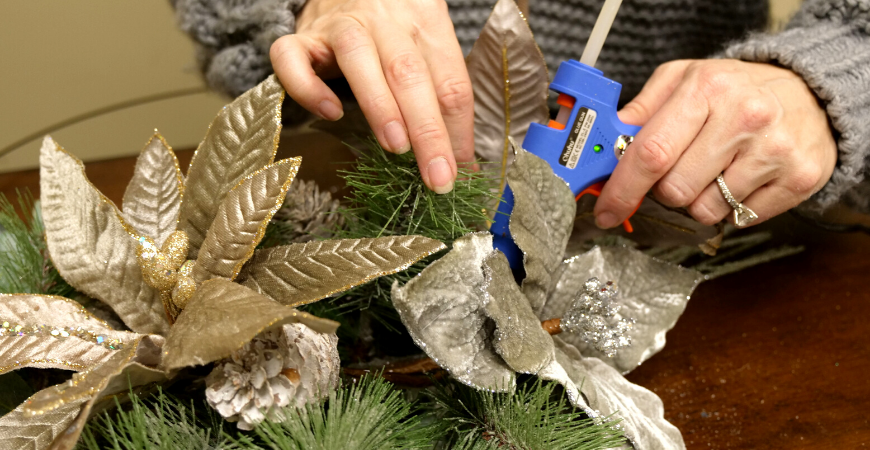
4) Glue it down
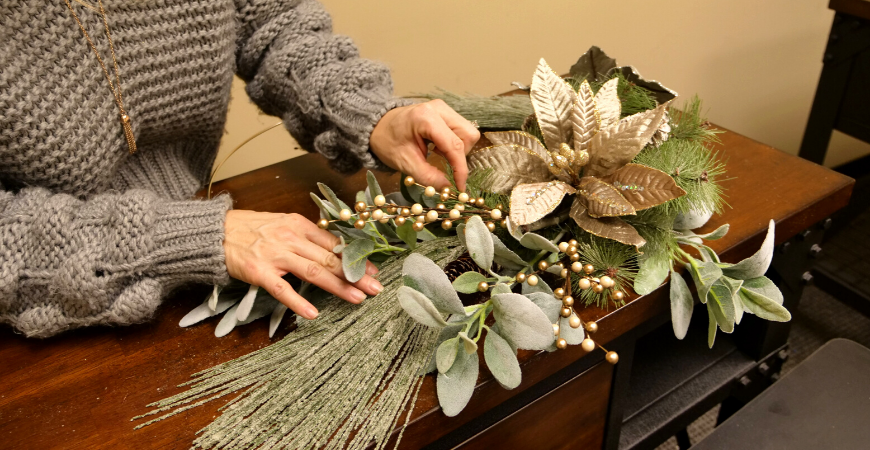
Once your wreath is arranged, it’s time to prepare your hot glue and start attaching your florals! Start from the back and work your way upwards.
We glued down the eucalyptus bunch of two first and then the iced pine branch pick. These 2 picks are in the back because they add extra texture and depth to the wreath.
Plus, they won’t cover up the smaller sprays like the poinsettias.
Next, glue the berry pick over the top. When the glue has dried, glue the next layer down, the pine spray.
When attaching the pine pick, weave it through the two underlying layers to make the floral arrangement flow. This spray helps to add volume to your wreath.
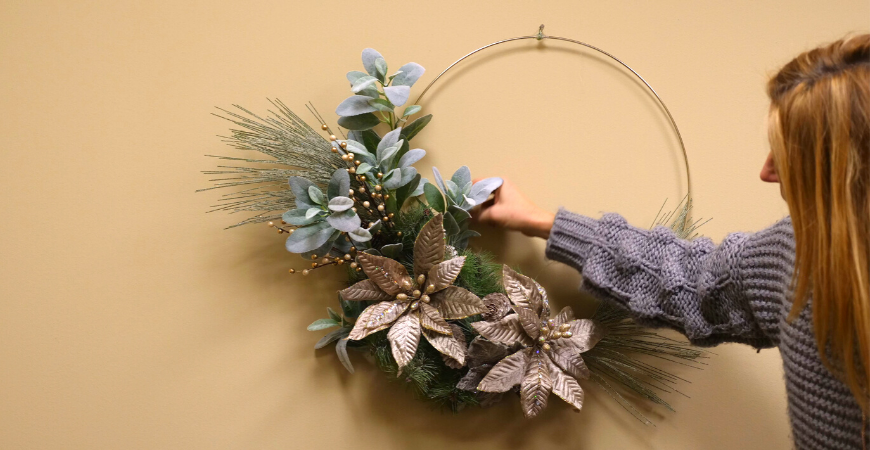
Lastly, add the gold-colored poinsettias. Apply a layer of glue onto the stem of the underlying layers. Then firmly press the poinsettia down.

5) Zip tie loose picks and stems
Use zip ties to secure the project’s loose floral sprays or stems. We zip-tied the eucalyptus bunch of two to prevent it from wiggling out of place.
If you don’t have a hot glue gun, this is also a great option to secure your floral picks and stems.
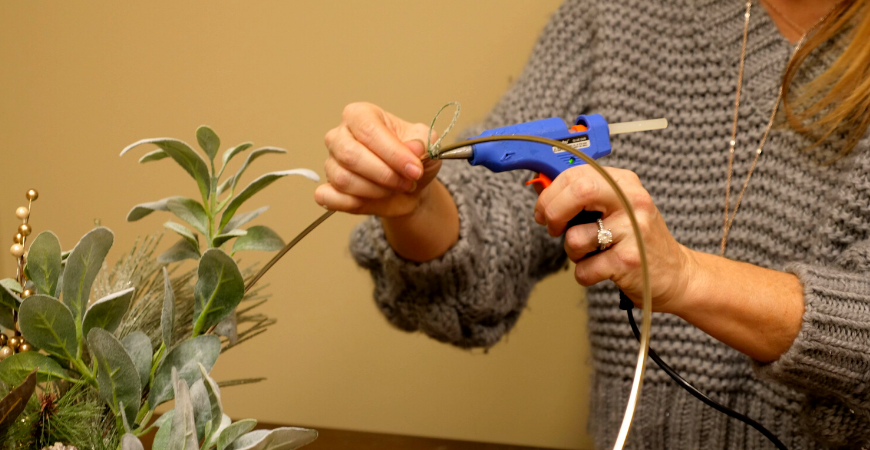
6) Make a loop
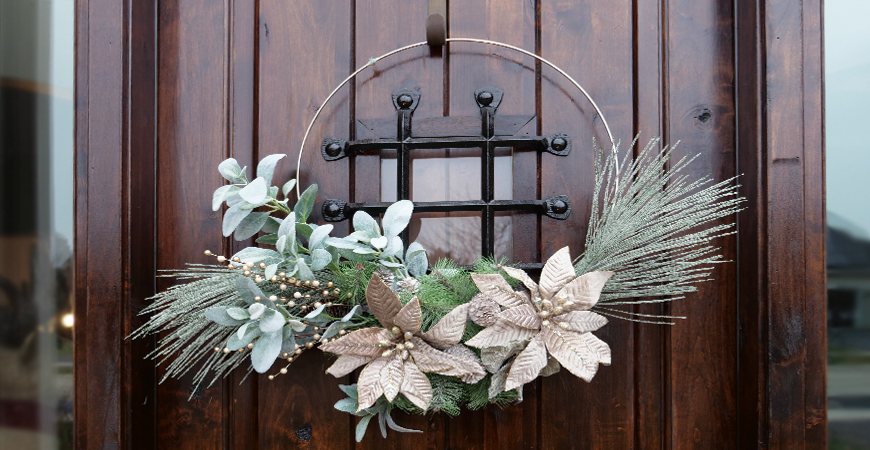
Finally, wrap the floral wiring around the top of the steel ring to create a loop. We applied hot glue to secure the project in place.
Once the loop is dried, the DIY project is ready to be put up for display on your wall! Hang up your new DIY wall decor in any room with a small nail and hammer. Voila!
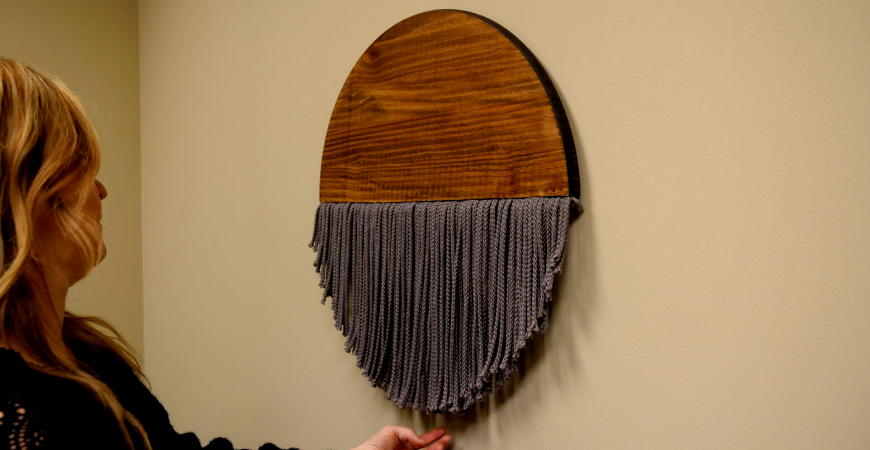
DIY Hanging Simple Wooden Macramé Wall Decor
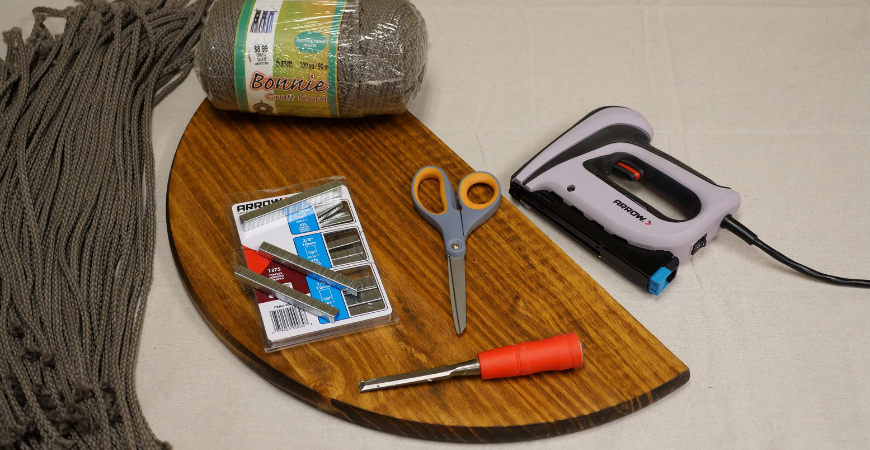
What you’ll need
- Craft cord – 6mm
- Staple gun and staples
- Scissors
- Halved wooden circle – 2 feet (1)
- Drill
- 2-inch drill bit
Instructions
1) Gather your crafting supplies
This DIY wooden macramé wall decor is easy to make since it only requires 6 crafting items. Check out the ‘What You’ll Need’ section above for the full list of supplies.
We used a gray craft cord for this DIY project, but you can pick any color you want!
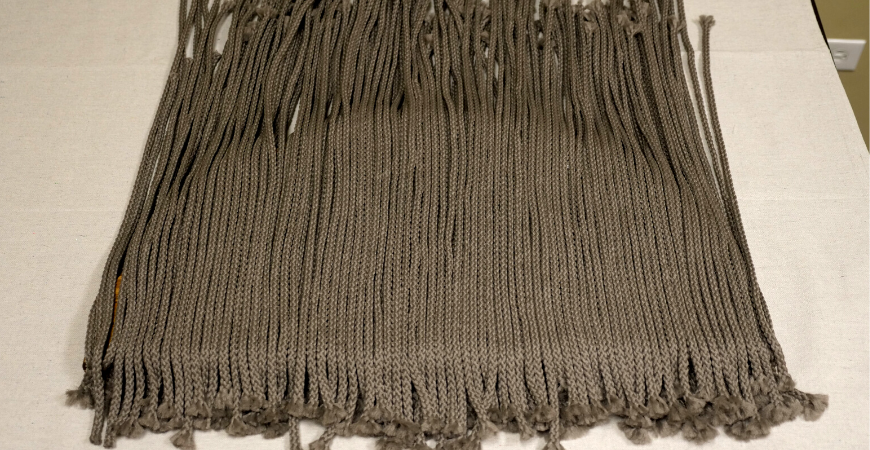
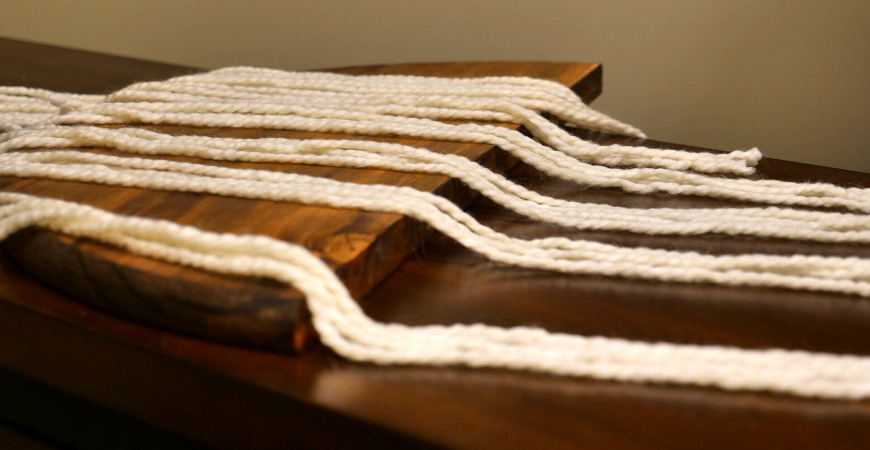
2) Cut and lay out the craft cords
The length of your craft cord will depend on the size of your halved circle.
Allow for 1/2 an inch to 1 inch of slack on the halved part. Since our halved circle is about 12 inches, we cut the craft cords to 24 inches.
This gave us some wiggle room for any potential DIY project mishaps.
3) Staple the craft cords
With your staple gun in hand, staple down 2-3 cords per staple. Moreover, be sure you’re stapling onto the halved circle side (the straight-edged part of the wood).
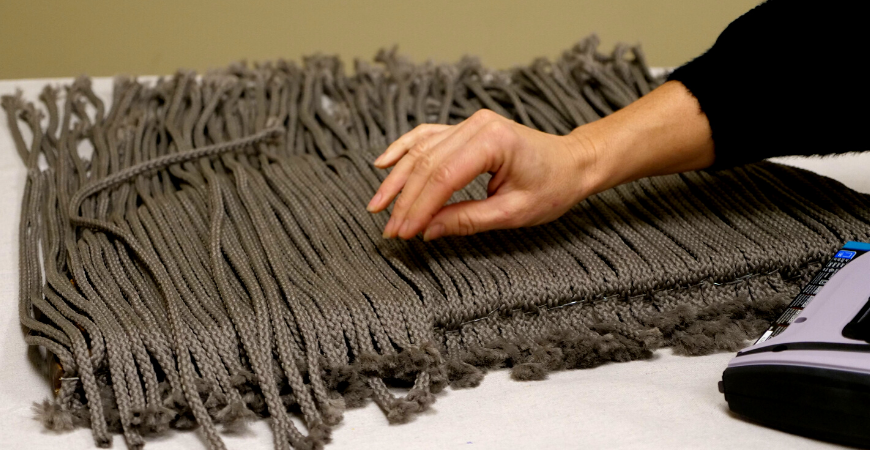
4) Trim and shape the excess craft cord
With the cords laying over the semicircle, get your scissors and cut the cords along the edge of the semicircle.
Pro tip: When cutting the cords, get a heavy book and place it on the cords to keep them from shifting around. This will help to make sure you’re not cutting a cord shorter than the design should be.
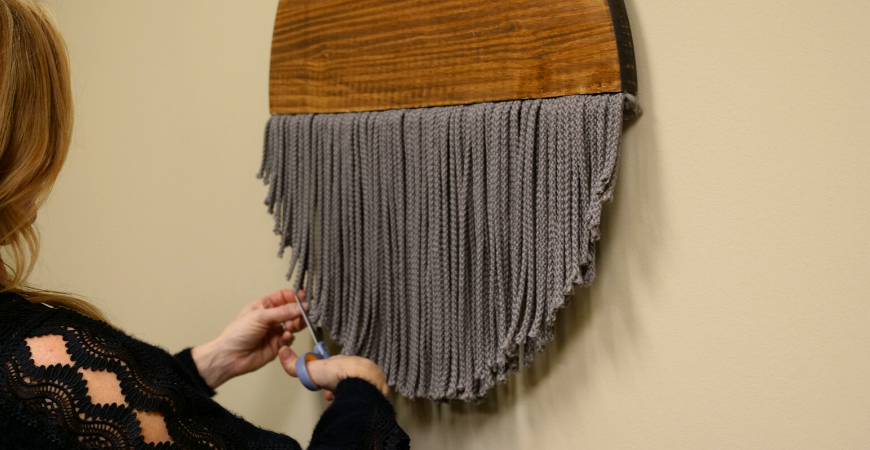
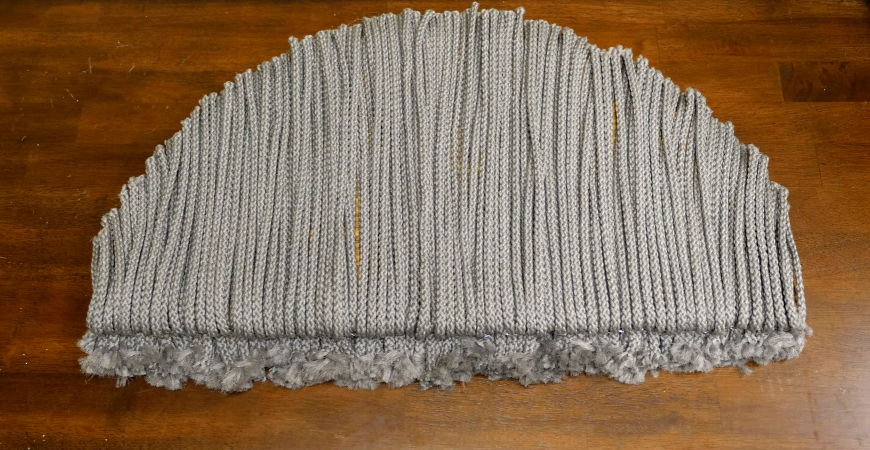
5) The finishing touches
Once the cords are stapled and sized to make the semicircle full again, hang it on your wall! Use the drill to create a small hole where you can hang your new wall decor art piece.
Don’t have a drill on hand? Another option is to hang it up with wall command hook strips.
Finally, carefully cut the ends for a simple look, or pull the craft cord end frays to add a little flare to the living space!
DIY Multi-colored Hanging Macramé Wall Decor

What you’ll need-
- Craft cord – 6mm (in 2 different colors)
- Staple gun and staples
- Scissors
- Halved wooden circle
- Drill
- 2-inch drill bit
Instructions
1) Check off your supply list
Likewise to the simple wooden macramé, the supplies needed are very similar. However, for the multi-colored macramé, you’ll need 2 different colored craft cords.
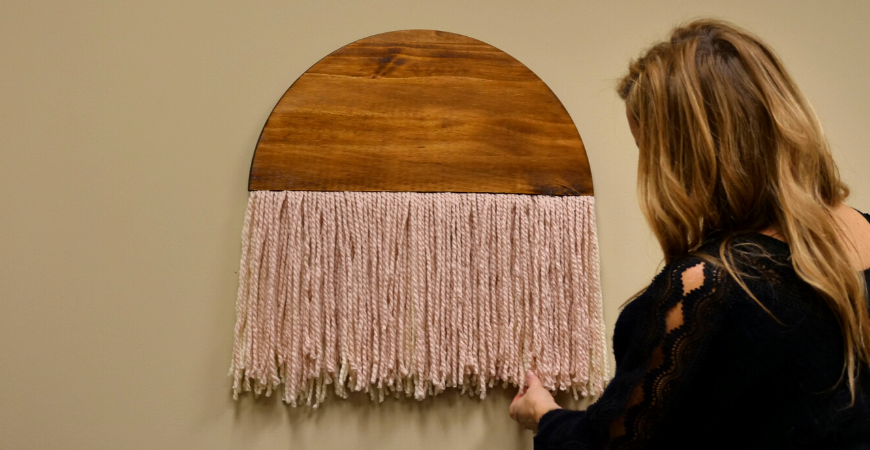
We decided to get baby pink and a cream-colored craft cord to match the living space.
2) Create a base layer
First, decide which color craft cord will be your base layer. We decided to get a cream-colored craft cord for this project to use as the first layer.
When it comes to the length of the cords, that’ll depend on the desired look and the room it will be going into. You can opt for shorter or longer frills depending on how high the decor will be on the wall. We have the cords at 24 inches to account for minor accidents.
Once you have the desired look and length, create groups of 3-4 to staple down onto the wall decor. Additionally, angle the cords slightly to have them fold them over nicely.
Staple the middle of the cords and then fold over. This will give the wall decor project more depth and volume in the living space.

3) Assemble the top layer
After your first or base layer, assemble the top layer. We used the baby pink craft cord as the top layer because it would add the perfect splash of color to the wall in any room.
Repeat the same process of stapling the middle of the cord to the straightedge of the halved circle. Then fold the cords resting on the wooden circle to add volume to the wall decor.
4) Hang it up
Hang up your DIY macramé wall decor in any room. You can do so by either using a drill with a 2-inch drill bit to create a small nail hole on the back or wall command hook strips.
In addition, this will give you a better idea of how long the craft cord will be hanging on the wall from the wooden semicircle.
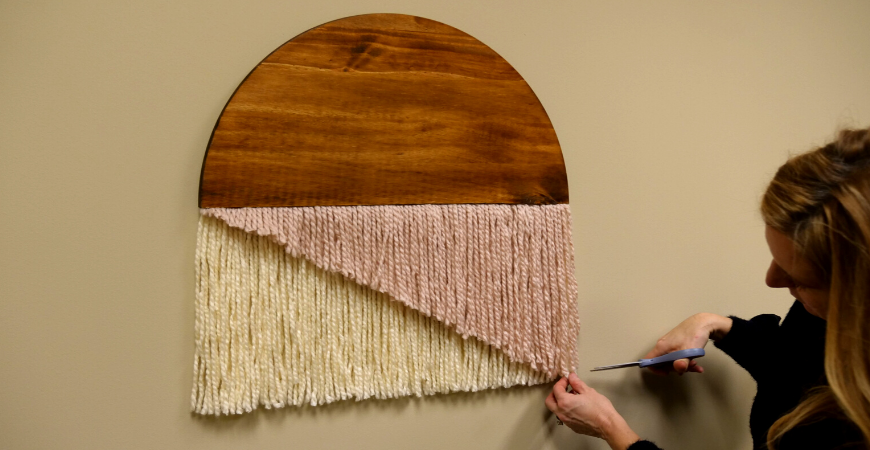
5) Trim, trim, trim
Now, it’s time to reveal the base layer. To do so, carefully cut diagonally across only the top layer.
This will expose the base layer color and make the top layer color pop! Plus, this will make the hanging wall decor look more 3-dimension and thus perfect for any room.
Trim off any frayed craft cord ends to finish this DIY wall decor piece. Once that’s done, you’ve got a new and customized DIY wall decor piece ready for any room!
Rather than spending hundreds on a hanging macramé wall decoration, DIY your own for under $35!
Looking for more ideas on ways to spruce up each wall in your home? Then, check out how you can create your very gallery wall!

Related Posts
 Fabulous DIY Faux Paint & Gel Stain Finishes for the Modern Home
- 5 Outdoors-Inspired DIY Nature Home Décor Ideas
- 5 Clever DIY Kitchen Organization Hacks
- 5 Gallery Wall Ideas to Style Your Living Space
- How to Make a “Wash Your Hands” Bathroom Wall Pallet Sign
- Dress up your Sink with these 10 Creative DIY Soap Dispensers