Handy Bathroom Shower Caulking Tips and How-Tos
You clean your shower often, so why does it still look dingy? Could it be that little space where the floor meets the tile wall? Over time, that thin strip of bright white caulk can turn into an icky, brownish-yellow color. So, follow these shower caulking tips and how-tos.
You’ll enjoy a beautifully refreshed, cleaner-looking shower in no time!
Why the Discoloration?
Caulk is frequently exposed to water and moisture. It’s an ideal place for mold and mildew to grow. The caulk eventually becomes discolored, which gives your shower a dirty appearance.
The first action is to determine whether the stains are on the surface or have seeped into the caulk. Over time, caulk can become porous. This allows moisture to penetrate the surface, encouraging mold and mildew to grow.
A simple cleaning should do the trick if the stains are on the surface. But, if the caulk stills look dirty after a good scrubbing, it’s best to replace the old caulk with a new bead.
Cleaning Shower Caulk
First, try cleaning your shower caulk. Here are three tried-and-true methods –
Apply Wet & Forget Shower, let it sit overnight, and rinse with water the next day. Repeat this daily for 2-3 days. Surface mold and mildew stains will come off the surface.
Wet & Forget Shower doesn’t contain bleach, ammonia, or dyes and doesn’t have a harsh chemical smell. It has a light vanilla scent and also doesn’t require any scrubbing.
Using Bleach Options: Bleach gel pens are one of the easiest-to-use cleaning options. Shake the pen; remove the cap, and give the pen a gentle squeeze to apply the gel along the caulk line. Let sit for 10 minutes, and gently rub with a damp sponge. Rinse with warm water, and wipe clean.
When using bleach with water, open a window, or turn on the ventilation fan in your bath. Breathing in bleach isn’t a good thing, so do this first. Put on protective gloves.
Mix one gallon of water and 1/4 cup of bleach in a bucket. Apply the solution to the caulk with a sponge. Let sit for 10 minutes. Scrub the caulk gently with an old toothbrush and rinse the surface with warm water.
Using bleach as a cleaning tool can create strong chemical fumes and harm some shower surfaces.
If mildew stains persist after cleaning, it’s time for more drastic measures.
Shower Caulking Tips – How to Remove Shower Caulk
If your caulk still looks dirty after following one of the cleaning methods above, it’s time to remove and replace it. First, take out the original caulking –
What You’ll Need
- Utility knife
- Razorblade tool
- Isopropyl alcohol
- Acetone
- Painter’s tape
- Caulk (100% silicone caulk is best)
- Caulking Gun
- Paper towels (for cleanup)
Step 1
Take the utility knife and cut it into the existing caulk to loosen it carefully to avoid scraping or cutting the surrounding tiles.
Note: If you have stone tiles, they are easily marred, so be careful.
Step 2
Carefully scrape away the caulk with a razor blade tool, and discard. Take out all old caulk so the new caulk will bond sufficiently.
Step 3
Clean the area thoroughly with isopropyl alcohol to remove oils and soap residue. If you see areas of stubborn, stuck-on caulk, apply acetone. The surface should be spotlessly clean, so the new caulking will properly adhere to the surface.
Step 4
Let the bathroom shower dry entirely before adding new caulk. Applying new caulk over a damp surface will encourage mildew to form and grow.
Shower Caulking Tips – Taping Off and Adding New Caulk

Step 1
For straight and neat lines, tape off the shower with painter’s tape before applying new caulk. Additionally, tape off all areas to be caulked, including the soap dish, metal fixtures, and nooks and crannies.
Step 2
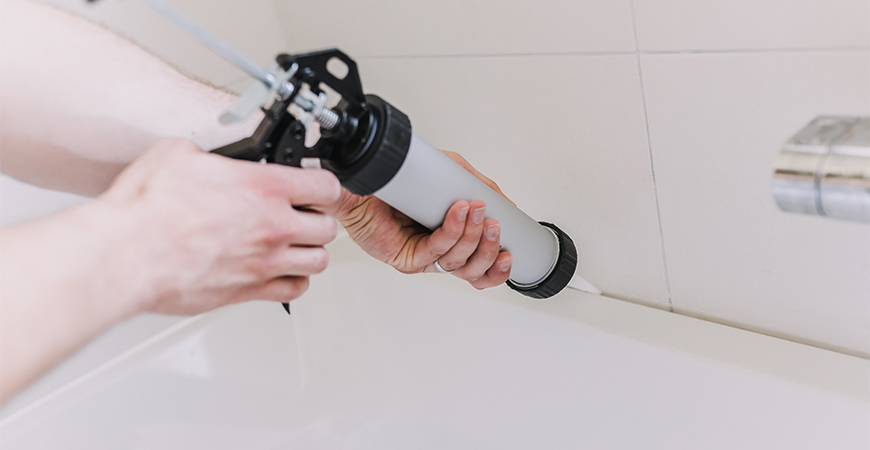
Apply caulk, ensuring that the product is pushed deep into the seam. The caulk should fill in any gaps to help keep mildew at bay. Also, pay careful attention to tile seams that run vertically.
It’s easy for water to work its way behind the caulk and into the wall.
Step 3
Smooth out the applied caulk with a wet finger. Add more caulk as needed to ensure the seam is filled and solid. Furthermore, keep in mind you’ll have about a 1/2 hour to apply the caulk and finish up as the caulk will begin to set.
Step 4
Grab one end of the painter’s tape and slowly pull to remove it from one side of the seam. Smooth the joint with your finger. Remove the tape on the remaining side, and smooth again.
Additionally, after the tape is removed, smoothly the caulk again. You’ll be rewarded with a straight, even seam.
Step 5
Wait 24 hours for the caulk to cure before using the bathroom shower. A new bead of caulk will make your shower look new again!
Note: If you start to see the caulk peel away from the surface after it has cured, you may not have entirely removed all of the caulk initially. We can’t tell you how important it is to remove every single speck of caulk before recaulking fully; otherwise, it will not adhere to the surface properly.
For detailed how-tos on replacing shower caulk, visit here.
Follow these shower caulking tips and how-tos, and you’ll enjoy a beautifully refreshed, cleaner-looking shower in no time!
Interested in learning more about upgrading your bathroom? Visit here.
For bathroom cleaning tips and how-tos, visit here.
Image by Emily May


Related Posts
 How to Organize Your Bathroom Vanity, Counter, and Cabinets
- Home Improvement Projects to Leave to the Professionals
- Eliminating Winter Window Condensation: A Homeowners How to Guide
- 3 Inventive DIY Bathroom Storage Ideas For Small Bathrooms
- Bathroom Transformations on a Budget
- Weather Stripping How-Tos for Doors and Windows