How to Dry Flowers, Plus Dried Flower Décor Ideas for Fall
Whether your treasured blooms from your favorite hydrangea bush or a gorgeous flower bouquet gift from a friend, having the flowers dried will preserve their beauty and enhance your home’s decor. See below for three ways to dry flowers. And decorating ideas, too.
First, determine if your flowers will dry well. The best blooms and greenery for drying include:
- Lavender
- Hydrangea
- Thistle
- Peony
- Yarrow
- Roses
- Chives
- Olive branches
- Baby’s breath
- Carnation
- Echinacea
- Globe amaranth
- Larkspur
- Lily
- Strawflower
When is the best time to cut garden flowers for drying?
The best time to cut blooms is just before the flower fully opens. Harvest the blooms to be dried in the early morning after the morning dew has evaporated.
3 Ways to Dry Flowers

Three ways to dry flowers include – air drying, microwave, and pressing. The drying method you choose will depend on the flower type.
Air Drying
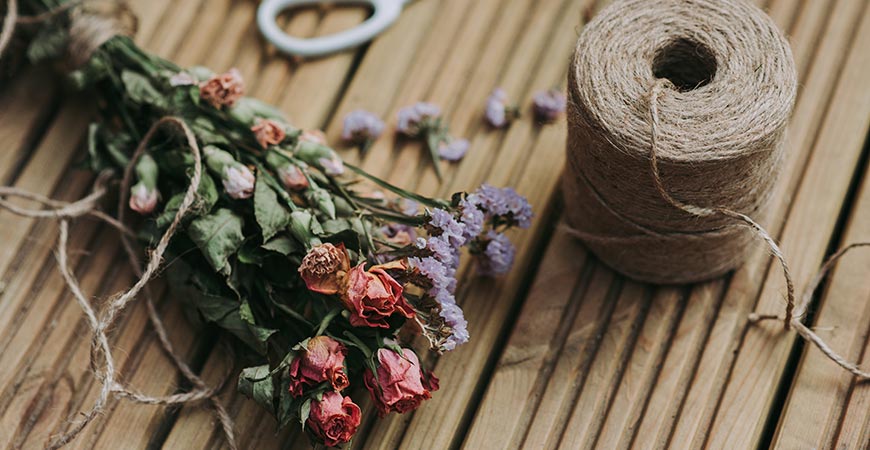
Air drying works well for a bouquet and a sturdy flower such as a rose or lavender.
What You’ll Need
- Your favorite blooms and greenery
- Rubber bands or Twine
- Dental floss
- Clothes hanger
- Unscented hairspray
Step 1
Remove excess leaves from the stems, and trim them to the desired length. It’s also best to leave a length of six inches or more. To help cut blooms, keep their color and move them away from sunlight as soon as possible.
Step 2
Locate a dark, dry space in your home that experiences good air circulation. A rarely-used closet or attic works well. If you have a bouquet or flower bunch secure them to be dried with rubber bands or twine.
Tie individual stems or flower bunches to the clothes hanger, stem ends up, using dental floss. Also, for delicate flowers, use dental floss to tie them in a bunch. Place the clothes hanger making sure the blooms are parallel to the floor.
Allow flowers to dry thoroughly – about two to three weeks.
Step 3
Remove blooms and greenery from the hanger. Spray the flowers with several light layers of unscented hairspray to create a moisture-proof seal. Or use a florist’s preservative spray– it’s more expensive but will preserve the color of your dried flowers longer.
When dry, place the bouquet or flower bunch in a vase for year-round enjoyment.
Microwave Drying
Flowers that work well for being dried inside a microwave include roses, gerbera daisies, tulips, and chrysanthemums. The microwave is also ideal for preserving the blooms’ color and the stems’ strength.
What You’ll Need
- Treasured blooms and greenery
- Silica gel (available in craft stores)
- Microwave-safe plastic container with a snap-on lid
- Small paintbrush
- Acrylic craft spray
Step 1
Before you start, check to ensure your microwave-safe container will fit into the microwave. Important note: The container should not be used for food storage after use.
Step 2
Pour 2 inches of silica gel into the container to cover the bottom. Add a bit more if you’re dried flowers are large blooms.
Step 3
Lay the flowers in the gel, with the flowers facing up. Gently spoon or pour additional gel over the petals.
Step 4
Place the open container in the microwave. Set the microwave on low (or a level just above the defrost setting), and microwave for two to five minutes. Remove the container every minute or so to check how to dried blooms are doing. Additionally, increase the microwave heat setting and length of time as needed for them to be completely dried.
Step 5
When the flowers are completely dried, immediately snap on the lid. Then, open the lid slightly at one corner to allow ventilation. Let the container sit, undisturbed, in a cool, shaded location for 24 hours.
Step 6
Gently brush the silica gel from the petal with a small paintbrush. Finally, mist the dried blooms with an acrylic craft spray to help preserve them.
Also, microwave blooms without stems for a shorter drying period and leave the flower heads in the silica gel overnight. Check in the morning to make sure they are fully dry.

Pressing Flowers
Pressing works well for more delicate flowers such as violets, shrub roses, and daisies. Furthermore, if you wish to press lilies or alstroemerias, remove the stamens first to prevent pollen stains.
What You’ll Need
- A selection of small flowers and greenery
- Newspaper, computer paper, blotting paper (any absorbent paper)
- Old books – Medium to large in size
Step 1
Line up the blooms to be dried on a sheet of paper. Place another sheet of paper on top.
Step 2
Open an old book near the center and place the layers of paper and flowers inside. Gently close the book.
Step 3
Place the book on a table and stack a few weighty books on top. Let sit for 3 to 4 weeks, checking if the flowers are dried every week or so. Furthermore, this type of preservation is ideal for projects in which dried flowers are displayed in a picture frame or keepsake jewelry.
Keep your dried flowers looking beautiful by keeping them in a cool, shaded area.
For more dried flower tips, visit here.
DIY a Pressed Flower Candle

Put your newly pressed dried flowers to good use by crafting a pressed flower candle. An easy and inexpensive craft project makes a great gift or a lovely addition to a nature-inspired tablescape.
What You’ll Need
- One white or light-colored candle (approximately 2.5 inches in diameter)
- A collection of pressed dry flowers and leaves
- Spray adhesive or a can of extra-hold hairspray
- Protective gloves (melted candle wax is hot)
- 1 tall, metal candle-making pitcher or a large coffee can
- Large saucepan
- 2 lbs paraffin wax
- Wax paper
A dollar store candle works great for this craft. The candle-making pitcher and paraffin wax can be found at craft stores.
Step 1
Spray your candle with spray adhesive. And place your pressed dry flowers around the perimeter in a pleasing design. Press to stick.
Step 2
Break the paraffin wax into smaller chunks with a kitchen knife, and place them in the candle-making pitcher.
Step 3
Add 2 inches of water to the saucepan. Carefully set the pitcher in the saucepan. Set the saucepan on the burner. Turn the flame on to low to melt the paraffin wax. Put on protective gloves. Slowly stir the paraffin wax with a wooden spoon until it completely melts.
Step 4
Holding the candle by the wick, gently lower the candle into the melted wax. Lift the candle out quickly, removing it from the pitcher. Dipping the candle will cover the design with a thin coat of wax. Therefore it will secure the floral design to the surface.
Step 5
Repeat step 4 above until the dried flowers are thoroughly coated to your liking.
Lastly, set the candle on a sheet of wax paper. Let dry.
Save the remaining paraffin wax by removing the pitcher from the saucepan, letting it cool, and then covering the top with aluminum foil. You’ll have plenty of paraffin left over for the next candle-making session.
For more how-tos on making pressed flower candles, visit here.
Whether you enjoy colorful flowers from your garden or receive a lovely bouquet as a gift, the beautiful dried blooms will bring year-round enjoyment to your home and maybe a reminder of someone’s kindness.