DIY Pebble Bath Mat And Other Ideas for a Quick Bathroom Makeover
Bathroom renovations can be a headache. They’re either too expensive or take an extensive amount of time.
Luckily, we found some quick and easy projects that you can make without tearing your bathroom apart or breaking the bank. We also included a quick step-by-step tutorial on making a DIY pebble bath mat.
Make Your Shower Sparkle
Before decorating your bathroom it’s essential to clean up your bathroom surfaces. Wet & Forget Shower is an easy way to clean your bathtub or shower, as well as your bathroom sinks and countertops.
Wet & Forget Shower will leave your shower looking brand new as it cleans and prevents the build-up of soap scum and everyday shower grime. It also cleans mold and mildew stains. See Wet & Forget Shower in action here.
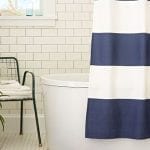
Dual Shower Curtain
Give your bathroom a refreshed look by adding an additional shower curtain.
Another way to give your bathroom a refreshed look would be to add another shower curtain to frame the shower much like curtains on a window. The dual shower curtain look completely changes the way space feels, and the only thing you’ll need to do is pick up a matching shower curtain to the one you already own.
Two shower curtains will turn heads and really softens a bathroom.
A Do-It-Yourself Pebble Bath Mat
A new bath mat is another way to change the look of your bathroom without investing too much time or money. We created an awesome pebble bath mat that looks amazing and feels great on bare feet each time you walk out of the shower.

Step 1: Materials
Before you create your pebble bath mat, here are a few things you’ll need to make it:
- Rubber for the mat
- Bags of various polished river stone
- Silicone
- Caulk gun
- Box cutting knife
For our pebble bath mat, we used two different kinds of stones. The first was larger and dark polished river stone to create the border of the mat as well as the inside. The other type of river rock was smaller, neutral colors used to make the inner ring of our pebble bat mat.
We found both types of rock for these bath mats at the local dollar store. For the surface of the mat, we used a sheet of rubber that we found at Lowes. Old exercise mats work perfectly for the base.

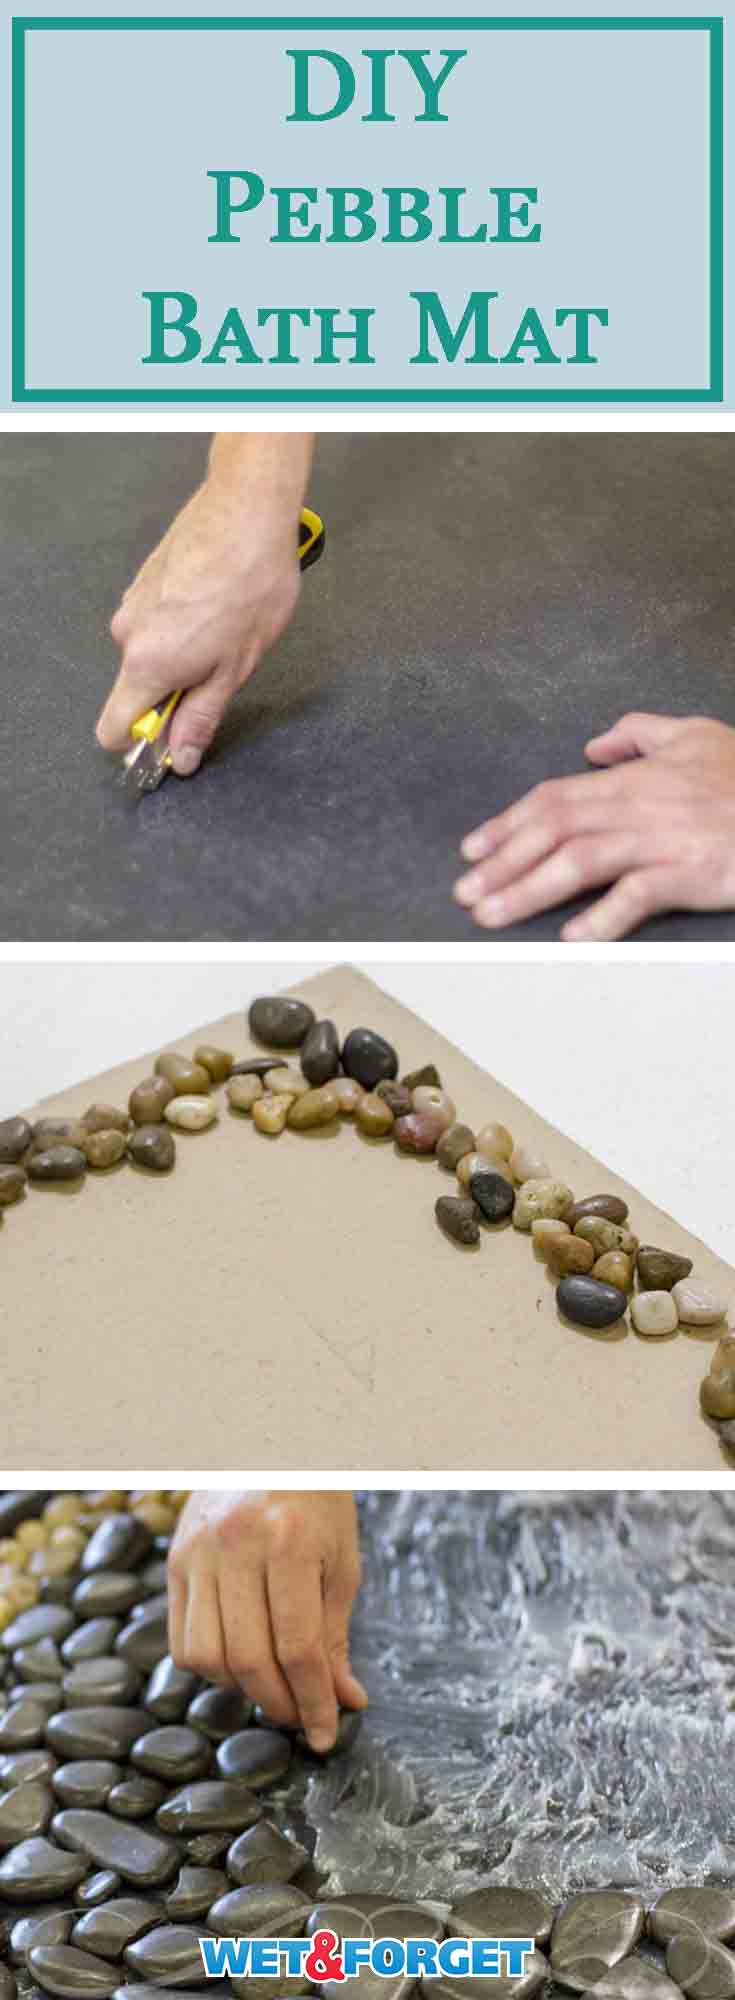
Step 2: Cutting the Mat
Your next step is to cut the rubber out to the size mat that works best for your bathroom. For our mat, we measured it out to be 30 in. long and 18.5 in. wide. We felt this size mat was perfect to fit in most bathrooms. This is the largest size we would recommend making your bath mat otherwise it will get quite heavy with each stone.
You can always go smaller with any mats, if that’s what your space requires. When cutting, make sure to score the mat before completely cutting.
Tip: Draw a straight line and cut slowly so that your mat is square. This step is important, it is tough to fix an uneven mat once you start adding your rock.
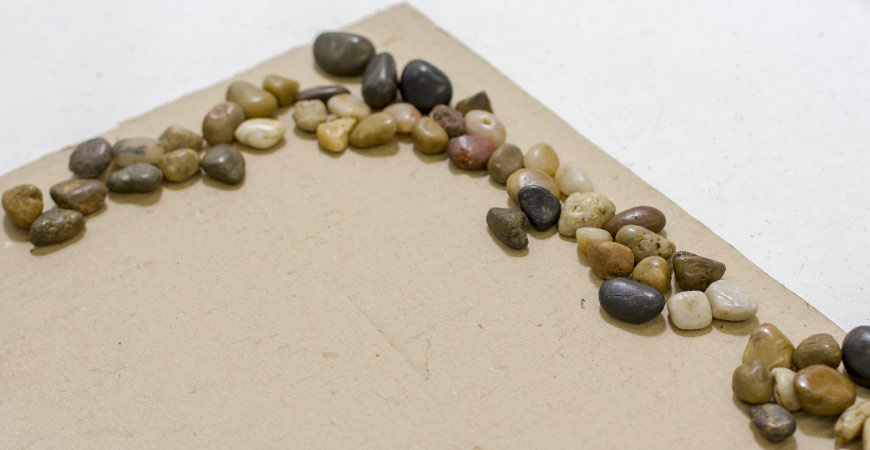
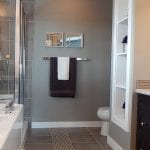
Step 3: Laying Out the Pebbles
The next step to creating your pebble bath mat is to layout your stones on a piece of cardboard cut to the same dimension as your rubber mat. This step will help with finalizing your layout and to assure you have enough of each stone to complete the project.
You don’t want to spend time trying to figure out how they all fit together while under the pressure of drying adhesive. For our bath mat, we used the larger, darker pebbles to make a border.
We then took the smaller neutral stones and created an inner ring. To finish the bath mat, we used the flattest black stones to fill in the center where you’ll be stepping on any bath mats.
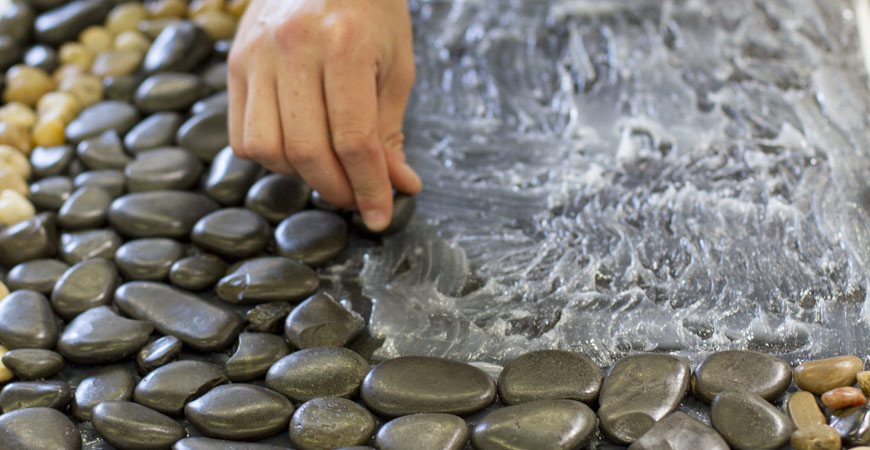
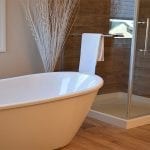
Step 4: Securing the Pebbles
After you have all your pebbles laid out how you want them, your next step is to simply transfer them over and secure them onto the rubber bath mats with a waterproof, mold and mildew resistant silicone and a caulk gun.
We applied the silicone to a quarter of the mat, then spread it out with a piece of cardboard. One by one, we moved each rock onto the mat, ensuring sure it all fit together as pre-planned. After finishing one section, move onto the next one and repeat the process of moving the pebbles.
After moving all the pebbles onto the rubber bath mat, we used smaller pebbles to fill gaps in the mat. Be liberal with the silicon and push down on each rock for permanent adhesion.
Step 5: Put It to Use!
We put heavy boxes on the bath mat overnight to help secure the rocks. Once the silicone has dried and the pebbles are secured, your new pebble bath mat is ready for use!
This new nature-inspired mat will give your bathroom a refreshing look while providing your feet with a nice massage as you step out of the shower!