DIY Window and Door Caulk Tips & Tricks
When chilly weather arrives outside, make sure your home stays warm and draft-free inside with door and window caulking. Caulk seals the air leaks around windows and doors.
Applying caulk can cut energy costs and boost your home’s energy efficiency. Here we cover caulking windows and doors and how to pick the best window and door caulk for winterizing your home.
Tips for choosing window and door caulk
Start by determining how many cartridges you’ll need for your project. Keep in mind that you will need approximately a half cartridge per window or door.
The caulking will typically come in disposable cartridges that fit into half-barrel caulking guns. However, another option is buying pressurized cartridges, so you eliminate the need for a caulking gun.
Moreover, you can find caulking sold in squeeze tubes, ropes, or spray cans for smaller projects.
Caulk will vary in price, properties, and strength.
If you decide to go with a caulk that requires a caulking gun, Home repair expert Bob Vila recommends “a caulking gun with a thumb release.” This allows for instant release when pressed and stops flowing when released.
Inexpensive or cheaper guns may result in excess caulk usage and can be harder to manage. When it’s time for cleanup, water-based caulk can be cleaned with water, while a solvent-based caulk will require a solvent for cleaning.

What type of caulk should I use?
Choose either acrylic latex or vinyl latex caulk as they will withstand natural wear and tear better.
- Acrylic latex works best in dry, low humidity areas and will last for up to 15 years before requiring replacement.
- Vinyl latex is best for damp, humid areas and lasts approximately five years.
Should I check the weather before I apply caulk?
Yes! Early fall is an ideal time for the job. Apply caulk when the weather is dry, and the humidity is low.
Outdoor temperatures should be above 45°F with low humidity. Furthermore, this will prevent cracks from swelling, and moderate temperatures will help the caulk adhere to surfaces and cure properly.
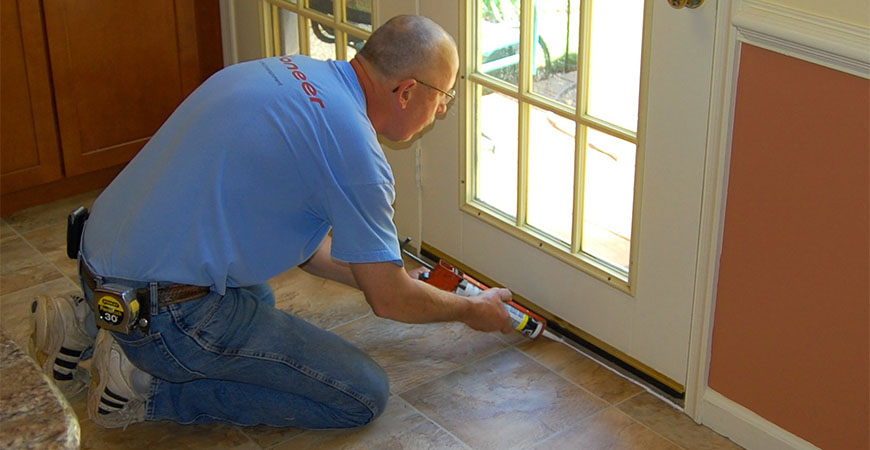
How do I apply caulk to my windows and doors?
Applying caulk isn’t difficult, but it does take some know-how.
First, ensure the new caulk adheres well by cleaning the areas that need caulking. Then, use a large screwdriver, wire brush, putty knife, or solvent to remove old caulk and paint.
Lastly, allow the caulked areas to dry thoroughly to prevent moisture from seeping in under.
How to prep the caulking gun
- Cut off the tip of the caulk cartridge at a 45-degree angle.
- Insert the tube in the gun.
- Do a “test run” by applying caulk to a sheet of newspaper or a paper towel. You’ll learn how the caulk flows and what to expect before starting on a door or window.
Top caulking tips
- Caulk in one continuous line, avoiding numerous stops and starts.
- Avoid creating bubbles by injecting caulk to the bottom of an opening. To fully seal a crack or seam, make sure the product sticks to both sides of the opening.
- Once you’ve applied 2-3 feet of caulk, dampen your finger or a foam paintbrush, and glide over the caulk bead. This will push the caulk into the crack forcing it downward to create a tight seal.
- Avoid applying too much caulk by releasing the trigger before pulling the gun away from the surface.
- Use a putty knife to push in caulk that oozes out from an opening.
- Some caulk will shrink, so use a generous amount. If shrinkage occurs, reapply caulk in a smooth bead to completely seal the crack.
- Allow the product to dry according to the package directions. The caulk usually takes 24 hours or more to cure, although drying time may vary depending on outdoor temperatures and humidity levels.
What supplies do I need to caulk my entry door?
Here’s a list of supplies that you will need to properly caulk your entry door:
- Exterior caulk
- Caulk gun
- 5-in-1 tool
- Box knife
- Mini pry bar or large screwdriver
- Foam cording
- Metal ruler
- Utility rags and water for water-based caulk or paint thinner for solvent-based caulk
What are the steps to caulk my windows and doors?
Step 1
Begin by removing all old caulk and backer materials. Use a pry bar to remove old caulk and use the 5-in-1 tool to dig out the backing material.
Then, grab the backing material with your finger to remove it. It’s best to thoroughly clean the space and remove as much debris as possible before adding new foam cording and caulk.
Step 2
Check the opening: use a foam backer rod to properly seal the space if the gap is wider than 1/4-inches. Sometimes, caulk alone cannot sufficiently span and seal the distance.
Slightly compress the foam backer rod. Gently press it into the space using the 5-in-1 tool to assist.
Step 3
Prepare the caulk by using a box cutter and cutting the caulk tube at a 45-degree angle. Then, apply a test bead on a sheet of newspaper before beginning.
If you find your test bead is too narrow to cover the opening, then cut the opening slightly larger.
Step 4
Start to apply the caulk slowly. Try to create a uniformed and solid bead down the length of the door casing.
Keep in mind if the opening is less than 1/4-inch, then be sure to run a finger down the bead to push the caulk into that empty space to create a smooth, flat surface. Furthermore, leave the caulking that’s on the backer rod alone.
Applying caulking to your exterior doors is a simple and easy fix that reduces draftiness, keeps moisture and mildew at bay, and saves you money on your heating and cooling bills. Check your exterior window and door caulk annually for breaks, gaps, or crumbling in the existing caulk. If you find any problems, then your caulking may need a refresh!
Photo Courtesy of: Mark Levisay
Related Posts
 Grow Decorative Moss and Bring new Life to your Home’s Look!
- Take Your Holiday Cookies to the Next Level with an Indoor Herb Garden
- Top Easter Succulent Ideas for Decorating Your Home
- Bathroom Transformations on a Budget
- Top Lucky Bamboo Care Tips & Tricks
- Make Your Shower Doors Gleam with Wet & Forget No-Scrub Shower Cleaner