How to Work a Bathtub or Shower Repair Kit Like a Pro
Ready to freshen the look of your bathroom? Try a DIY tub and shower repair kit available at most hardware stores and home centers.
A do-it-yourself shower repair kit applied to ceramic, porcelain, or fiberglass surfaces, can renew old tub and shower faucets or completely change their color if you wish. Here’s how:
Refinish Your Bathtub and Shower with a Repair Kit
Supplies:
Cleaning and Surface Preparation:
- Wet & Forget Indoor (to remove mildew)
- Abrasive cleaner
- Abrasive pad
- Sandpaper (#400/600 grit wet/dry)
- Putty knife
- Tack cloth
- Painter’s tape
- Fan (for poorly ventilated areas)
- Respirator (optional)
Paint Application:
- Wooden stirring stick
- Paint tray
- Fine bristle varnish brush or a good-quality, short nap bath roller
- Small foam brush (for corners)
- Safety glasses
- Disposable gloves
Step 1
First, ensure to adequately ventilate the area by opening windows or placing a fan in the bath to circulate the air. Before beginning, read all instructions in the tub or shower repair kit.
Step 2
Inspect the surface, patch, and repair cracks with an epoxy patching compound. Repair cracks before the tub or shower repair kit application; this ensures your kit will have the underlying prep required to achieve a fresh, renewed finish.
Step 3
Put on safety glasses and disposable gloves. If you’re sensitive to strong odors, use a respirator while using the tub or shower repair kit.
To remove mildew, spray Wet & Forget Indoor on the surface, let the surface sit for 10 minutes, then wipe the surface. To remove dirt, scrub all surfaces with an abrasive cleaner. Remove caulk with a putty knife and wipe the area dry.
Scrub the entire surface with an abrasive pad and cleaner specially formulated for removing calcium deposits and hard water stains. Let the cleaner sit on the surface for 5 minutes, rinse and let dry.
Sand the surface with #400/600 grit wet/dry sandpaper. Rinse thoroughly. Allow the surface to dry completely. Wipe down all sanded surfaces with a tack cloth to remove dust.
Before applying the repair kit, use painter’s tape to mask off metal drains and faucets.
If your tub or shower repair kit requires mixing two solutions, use a wooden stirring stick to blend them. Apply the solution to the surface needing a repair using a high-quality, short nap roller or a fine bristle, varnish brush.
Hint: It’s a good idea to prep the roller before the repair by removing loose fibers. To do this, wrap the roller with painter’s tape and then pull off the tape to remove excess fibers.
Step 4

Use light, even strokes to smoothly apply the refinishing kit. For corners, use a small foam brush. Allow the surface to dry at least one hour before applying the second coat.
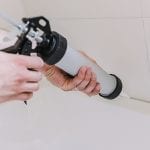
Remove the painter’s tape and allow the tub or shower surface to dry for a minimum of 3 days or according to package directions. Caulk the affected areas and allow them to dry according to the manufacturer’s instructions on the kit.
When cleaning your newly refinished surface, use a mild, non-abrasive product, such as Wet & Forget Shower.
Quick Repair Extra- How to Repair Chipped Steel or Cast Iron Bathtubs

What causes unsightly chips on a tub made of enamel or porcelain-coated, steel, or cast iron? The usual culprit is something heavy being dropped on the tub surface, such as a wood handle brush or shampoo bottle.
If your bathroom has a steel tub, it may flex when struck, resulting in a chip. Although a cast iron tub is stronger, the coating may chip over time. It’s wise to repair your chipped tub to minimize rust and improve its appearance.
Supplies:
- Dremel tool or acid-based toilet bowl cleaner (to remove rust)
- 2 household sponges, one wet and one damp
- Isopropyl alcohol
- Paper towels
- (10 to 20 percent) mineral spirits (optional)
- Small artist’s paintbrush
- Porcelain touch-up glaze
Remove rust from the chipped area using a Dremel tool, or dissolve the rust with an acid-based toilet cleaner. Apply the toilet cleaner to the chipped area with a Q-tip. Let the toilet cleaner sit for 15-30 minutes.
To remove rust from a tub, wipe the area with a wet sponge; wipe again with a damp sponge. Immediately flush the chipped area with isopropyl alcohol. Any water remaining on the surface of the tub will evaporate.
Wipe away the excess with a paper towel. Let dry.
Paint over the chipped area with a small artist’s brush with porcelain touch-up glaze. Apply the glaze in thin layers allowing it to dry for at least one hour between coats.
If the glaze is too thick, thin it with a little mineral spirit (10 to 20 percent). Thinning the glaze will also minimize brush strokes. Allow it to cure thoroughly, per the kit’s directions.
For cleaning your new bathroom surfaces, use a cleaner that doesn’t contain harsh chemicals like bleach or ammonia. Wet & Forget Shower will help keep soap scum, shower grime, and body oils at bay with one weekly application.
Learn more about keeping your bathroom clean with Wet & Forget Shower here.