Keep Water Away from Your Foundation With Rain Gutter Chains
A rain chain protects your foundation from water overflow and also adds beauty to your home. Here we cover rain gutter chains. What they are, how they work, and how to use them. We’ve also included instructions for a DIY rain chain.
What is a rain chain?
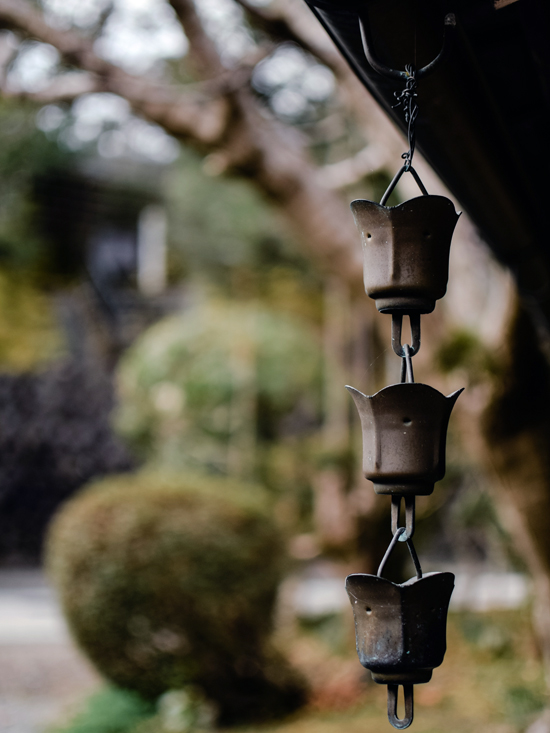
Rain chains have been used for centuries. These attractive and functional garden ornaments originated in Japan, where they are called kusari-doi. A rain chain provides an eye-catching alternative to a traditional downspout.
Rain chains move rainwater from gutters to a container or a designated area, turning a sudden rain shower into an entertaining water feature. Rain chains are used as functional garden décor in Asian and botanical gardens.
Home repair expert, Bob Vila, says, “Rain chains transform a plain gutter downspout into an aesthetically pleasing water feature. A rain chain comes with an installation kit for attaching it to a gutter. Simply remove the downspout, then replace it with the installation kit at the top and connect the rain chain. You can replace all downspouts around the house or specific ones.”
Consider installing rain gutter chains to enhance your home’s beauty and curb appeal.
Why should I use a rain chain?
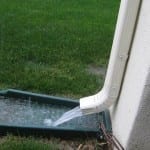
- A rain chain guides water away from your home’s foundation to a container, water feature, or drainage area.
- Adds beauty to your home’s exterior.
- Reduces soil erosion and soil loss.
- A rain chain emits a pleasant, tickling sound as water flows over surfaces.
- Rainwater directed to a rain barrel or container can be saved to later use in your garden.
How do I install a rain chain?
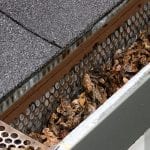
First, decide where to install it. If you have gutters, a rain chain can be used in place of a downspout. If you do not have gutters, watch your roofline when it rains to see where the water falls from the roof. (This is usually at an eave where the rooflines meet.)
Check the soil below the area where water falls from the roof. If you notice soil loss, this is a good place to add a rain chain to help minimize soil erosion.
Installing a Rain Chain
What You’ll Need:
- Rain chain
- An anchoring dish, plant container, rain barrel, or water feature
- ¾” Drainage rock – It’s best to use rough-edged rock
- River stones (optional)
To attach the rain chain to your gutter, follow the directions provided with your purchased rain chain. How you connect the chain may vary according to the type of chain you buy.
Install the chain so that it touches the ground. This prevents it from swaying in the wind.
When installing, make sure the rain chain touches an anchoring dish or plant pot.
Dig a shallow hole 6 inches deep under where the dish or pot will sit. Dig the hole a few inches wider than the width of the container.
Fill the shallow hole with ¾ inch drainage rock to help prevent soil erosion. Place the anchoring dish or container on top. Secure the rain chain to the container.
Make the area visually pleasing by placing smooth river stones over the drainage rock and in the container. Test the installation by aiming a garden hose at the roof. Adjust the chain if needed.
If you plan to add a rain barrel, ensure the chain is hung just short of touching the top of the rain barrel.
Learn more about installing rain chains here.
Do rain chains work during a heavy thunderstorm?
Each style of rain chain functions differently when transporting water during a downpour. A gutter or downspout will ensure that water is properly flowing down the rain chain.
What styles of rain chains are sold?
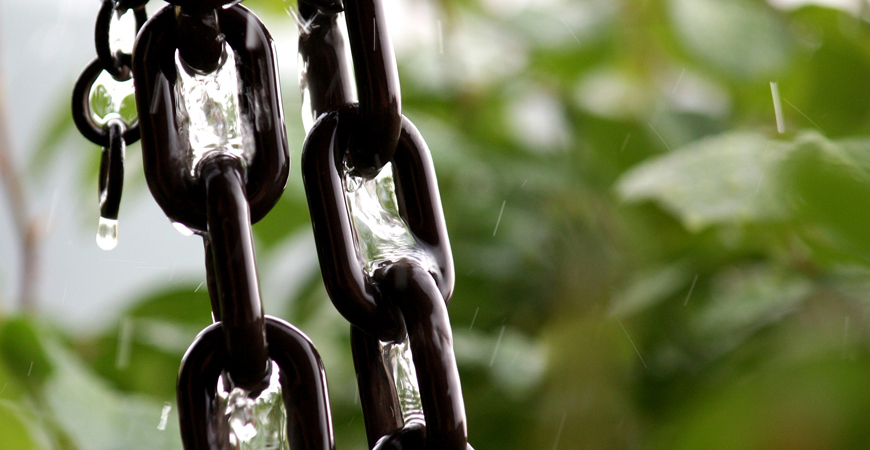
A rain chain may be as basic as a chain made of metal loops. More ornate styles feature flower, fruit, and nature designs.
Most rain chains are made of aluminum, stainless steel, copper, or bamboo.

How much do rain chains cost?
Prices vary depending on the chain’s design and the material used. A copper chain in an intricate design will cost more than a simple loop chain made of stainless steel. Prices for a quality rain chain start around $50.
How do I make a rain chain?
A home-crafted rain chain will work just as well as a purchased one. Plus, it’s a fun DIY project for the family.
Follow the instructions below to make a rain chain for a one-story home.
What You’ll Need:
- 9 ft or more of ½” metal chain
- 2 large ‘S’ hooks
- 9 small ‘S’ hooks
- 9 small galvanized metal pails
- Pliers
- Drill with a ½” drill bit
How-to:
- Attach one small S hook to the handle of each pail. Use pliers to secure the hooks to the handles.
- Drill a 1/2″ hole through the bottom of each bucket.
- Thread the chain through the pails, leaving approximately 8 inches of chain at the top.
- Connect each pail to the chain using the open end of the small ‘S’ hook attached to the handle.
- Attach one large ‘S’ hook to the top of the chain.
- Attach the second large ‘S’ hook on the bottom of the chain. This helps secure the chain to an anchoring dish, pot, or rain barrel.
Bonus Tip: It’s a good idea to check the soil under your rain gutter chain periodically. If you see signs of soil erosion, then add more drainage rock or switch out the anchoring dish for a larger one. If you notice standing water, take steps to ensure water is directed away from your home’s foundation.

Related Posts
 Rain Gutters – How They Work Plus Important Installation Tips
- Prevent Water Damage with this Can’t-Miss Spring Rain Gutter Checklist
- Put Fall’s Rain to Work Cleaning your Home with Wet & Forget Outdoor!
- Protect your Home with this Essential Springtime Rain-Gutter Care
- New Uses For Old Rain Boots
- Water Your Garden, Save Money and Live Green with a Rain Barrel!