A Homeowner’s Guide to Spring Lawn Renovation
A beautiful, lush lawn is the goal of most homeowners. You can create a greener, healthier lawn by encouraging new growth with a spring lawn renovation.
A lawn renovation has many benefits, including eliminating weeds competing for the same turf.
Spring is the best time to do a lawn renovation because your grass is just waking up from its winter ‘sleep’ And will need moisture and nutrients.
Step 1 – Get Your Soil Checked
Call your county extension office and request a soil test. You can either drop by the office with a soil sample or ask for a test kit to be mailed to you. The cost is small – approximately $10.
A soil sample kit usually includes a mailing envelope to mail the sample to the testing lab. You’ll receive a report by mail with an analysis of your soil’s pH level, nutrient content, and composition.
Your report will indicate what you need to do to correct any soil problems. Early spring is the best time to do a soil test and begin improvements.
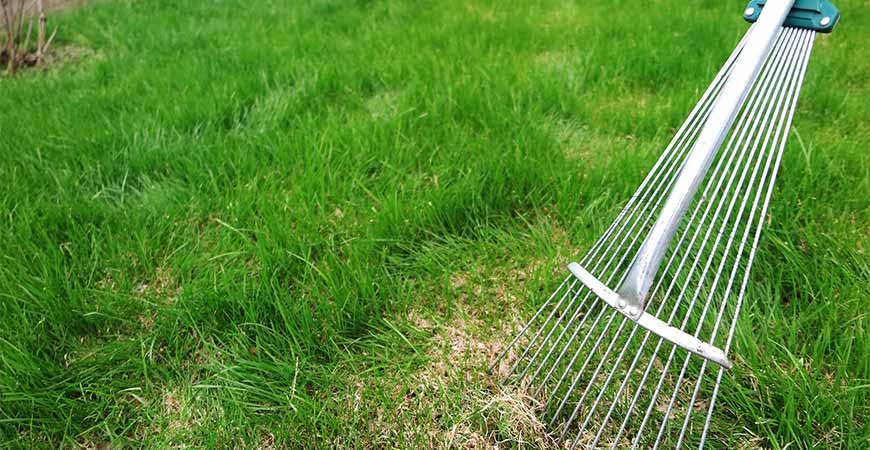
Step 2 – Remove Last Season’s Thatch
Thatch consists of small bits and pieces of dead grass, weeds, and debris that gradually accumulate on your lawn. It forms a barrier preventing nutrients and moisture from reaching the roots. This will weaken the grass and inhibit growth.
Removing built-up thatch will let in light, air, and moisture. A dethatching rake or mower dethatcher attachment will remove thatch build-up.
Pro Tip: Wondering if you have a thatch problem? Stick your finger in the lawn to the soil level. You may have that problem if it’s difficult to reach the soil. Another indicator is the top layer of grass will feel matted and sponge-like.
Pro Tip: Before using a dethatcher attachment, mark any utility lines, sprinkler heads, or irrigation lines buried in your yard.
Step 3 – Aerate the Soil
After you remove the weeds and other debris, aerate hard, compacted soil. This will make your lawn thicker and healthier in just a few weeks. Aeration breaks up the soil allowing your lawn to ‘breathe,’ which means sun, fertilizer, and water can easily reach the roots.
Pro Tip: If you see water puddling on top of your grass after a storm, it may mean that your soil is compacted. Aerate as needed – approximately every five years is recommended.
You can rent a lawn aerator at your local garden rental center. A lawn aerator works by cutting and pulling 2-3 inch plugs from the ground at an approximate 3-inch spacing. Removing plugs from the turf decreases compaction and improves drainage.
The open holes left by the aerator help boost nutrient and water absorption. And provide room for new roots to grow. If your thatch is thick (3/4 inch or more), consider hiring a lawn service to do the job.
Pro Tip: Water your lawn the day before you aerate. The soil will be easier to remove.
Step 4 – Apply Compost and Soil Amendments
Refer to your soil test information (Step 1) to see which nutrients need to be added and in what amount. Include nitrogen in the mix as it’s always required to boost the ‘green’ of your lawn. Applying compost will add needed phosphorous, potassium, nitrogen, and micronutrients to the soil.
Step 5 – Add Grass Seed

If you have bare spots on your lawn, spring is the time to plant new seeds. Follow the manufacturer’s directions on the bag. If you plan to put down sod, ensure the bare soil is free of rock, branches, weeds, and other debris.
Fill in any holes or low areas with dirt. And feed the topsoil with fertilizer, lime, and needed amendments listed on your soil test report.
Pro Tip: To condition clay soils, till in gypsum or well-rotted manure. To improve sandy soil, add compost or rotted manure. These natural add-ins will improve the soil’s ability to retain nutrients and moisture.
Step 6 – Water Regularly
Routine watering is essential to a successful lawn renovation. And for new grass to thrive. Temperatures can rise quickly, so don’t let your grass seed or sod dry out – keep it moist until the roots are established. Then continue regularly.
For more lawn renovation tips and how-tos, visit here.
DIY Solutions to Common Lawn Problems

Dog Spot
If you find dead spots in your yard, you may assume a disease is present. But if you have a canine, he may be the reason. Dogs tend to visit the same spot repeatedly – eventually killing the grass.
A dog’s urine contains a high level of nitrogen which will burn the grass, eventually causing it to die. The process is similar to adding too much fertilizer to the soil.
How to Remedy Dog Spot
- Use the hose to saturate the spot. This will dilute the urine in the soil.
- Choose a designated spot in the corner of your lawn to create a dog potty area. Cover the area with pea gravel, mulch, or another paw-friendly material that is easy to rinse with the hose. Train your dog to visit this area when nature calls. Keep your dog well hydrated by allowing easy access to water. This will lower nitrogen levels – naturally.
For more detailed information on building an outdoor dog potty area, visit here.
Too Much Shade
A sun-loving grass planted beneath a mature oak tree can mean sparse or patchy growth. Planting a shade-tolerant variety like creeping red fescue (Festuca Rubra) may be the answer. Creeping red fescue requires only a little time in direct sun daily. Plant grass seed on your lawn during cooler weather – early spring or fall.
Or, if you have full, mature trees, consider hiring an arborist. A higher, thinner tree canopy will allow more light and moisture for a healthier lawn. Then again, big tree roots may be to blame. Reduce competition for nutrients by removing large roots that poke above the lawn.
For more detailed information on common lawn problems, visit here.
Following a lawn renovation plan and fixing common lawn problems will help keep your turf grass healthy, lush, and green through spring, summer, and fall. And for the years to come.
For more lawn care tips and how-tos, visit here.
For additional home gardening tips, visit here.


Related Posts
 How to Spring Clean Your Grill Before Cookout Season
- Get Creative for Spring with These Gardening New Year’s Resolutions
- All About Planting Spring Blooming Bulbs in Fall
- Prepare Garden Beds for Spring: Essential How-Tos and Tips
- Prevent Water Damage with this Can’t-Miss Spring Rain Gutter Checklist
- Spring Ahead with these 5 April Home and Garden Boosters!